Like a lot of other pilots, I’ve acquired a GoPro Hero3 for recording videos of my flights. The main problems most folks have is unpleasant strobing effects, which on rolling shutter cameras like the GoPro produce distortions of the prop; and the “jello” effect, which makes the image appear to deform like a shaking bowl of jello. I’ve been experimenting to get the best results, and I thought I’d share some of my findings. Here’s the video from today’s flight:
As you can see, the prop is blurred enough that it’s almost invisible, and there’s no detectable jello effect. Here’s how I shot it. First, the video settings were:
- Video Resolution: 1080
- Frame Rate: 24 fps
- Field of View: Medium
- Spot Meter: On
- Protune: Off
I probably should have had the spot meter off, but had been shooting video showing both inside and outside the cockpit earlier. In addition, I used a modified case with an adaptor ring allowing me to attach 58 mm filters. This video was made using a 1.8 ND filter (actually two filters, 0.6 ND + 1.2 ND) plus a UV filter. The 1.8 ND filter is used to blur the prop to avoid the ugly (IMO) propeller strobe effect. To attach the filter, I modified a GoPro case, using a technique similar to that used by Phil Boyer:
Because the Hero 3 case is a little different than the Hero 2 case, I had to modify his method a bit. I used a Fotodiox 30-58 mm metal step up ring. To fit it to the GoPro case, I first removed the screws in the case holding the glass cover over the GoPro lens, and removed the outer frame and glass cover. I then ground off the smaller ring of the adapter on the back with a Dremel tool, and drilled 4 holes in it to line up with the 4 machine screw holes in the GoPro case. I then attached the adapter to the case with the four machine screws I had removed earlier.
I use 58 mm filters because that is the largest filter I can attach without interfering with the GoPro on/off button. At the medium field of view (which I found to be best for flying videos), I can then stack up to three filters without vignetting. Phil Boyer suggested using 46 mm filters, but I found that even 52 mm filters resulted in a small amount of vignetting when three filters are used.
I ordered a Tiffen 58mm digital neutral density filter kit, which comes with a 0.6 ND, 0.9 ND, and 1.2 ND filter. By using one filter or stacking two, you can get a 0.6, 0.9, 1.2, 1.5, 1.8, or 2.1 ND filter. Phil Boyer suggests using 1.5 ND, which works quite well. On a very bright day, especially with brightly-lit clouds, 1.8 ND may be better. On the top video here, I used 1.8 ND, which very nicely blurs the prop to almost the point of invisibility, but results in a little underexposure when in the shade of a cloud. If in doubt, I would use 1.5 ND during the day, and less of course around dusk. Finally, I use a UV filter to cut out the effects of haze.
For audio, I use an audio adapter specifically made for use with the GoPro Hero3 and aviation headsets. The benefit is that you get ATC communications, but unfortunately you lose all ambient sounds. You can recover the ambient sound by turning the squelch on the intercom all the way down, but I find the resulting static too annoying. On my airplane, there’s a bit of a whine proportional to engine speed, probably due to alternator noise, which is actually oddly satisfying — it let’s me imagine I’m flying a turbine instead of a light piston. The stall horn is audible on the video above, because it is loud enough to activate the intercom.
The other problem to solve is the “jello” effect, which is caused by vibration of the GoPro camera. We’ve all seen examples of this in aviation videos, and it’s really distracting. To eliminate this effect, I do a couple of things. First, I mount the GoPro using the suction cup mount on the stiffest point I can find. On a 172RG (or a Skyhawk), that turns out to be on the windscreen just below the right wing-root air vent. That point is stiff because it’s close to the aircraft frame, and because the curvature in the windscreen near that point adds stiffness to the plexiglass.
The jello effect can also be reduced by adding a little damping. I do that by tightly folding and rolling a micro-fiber cloth, and wedging it between the windscreen and the camera, as shown below:
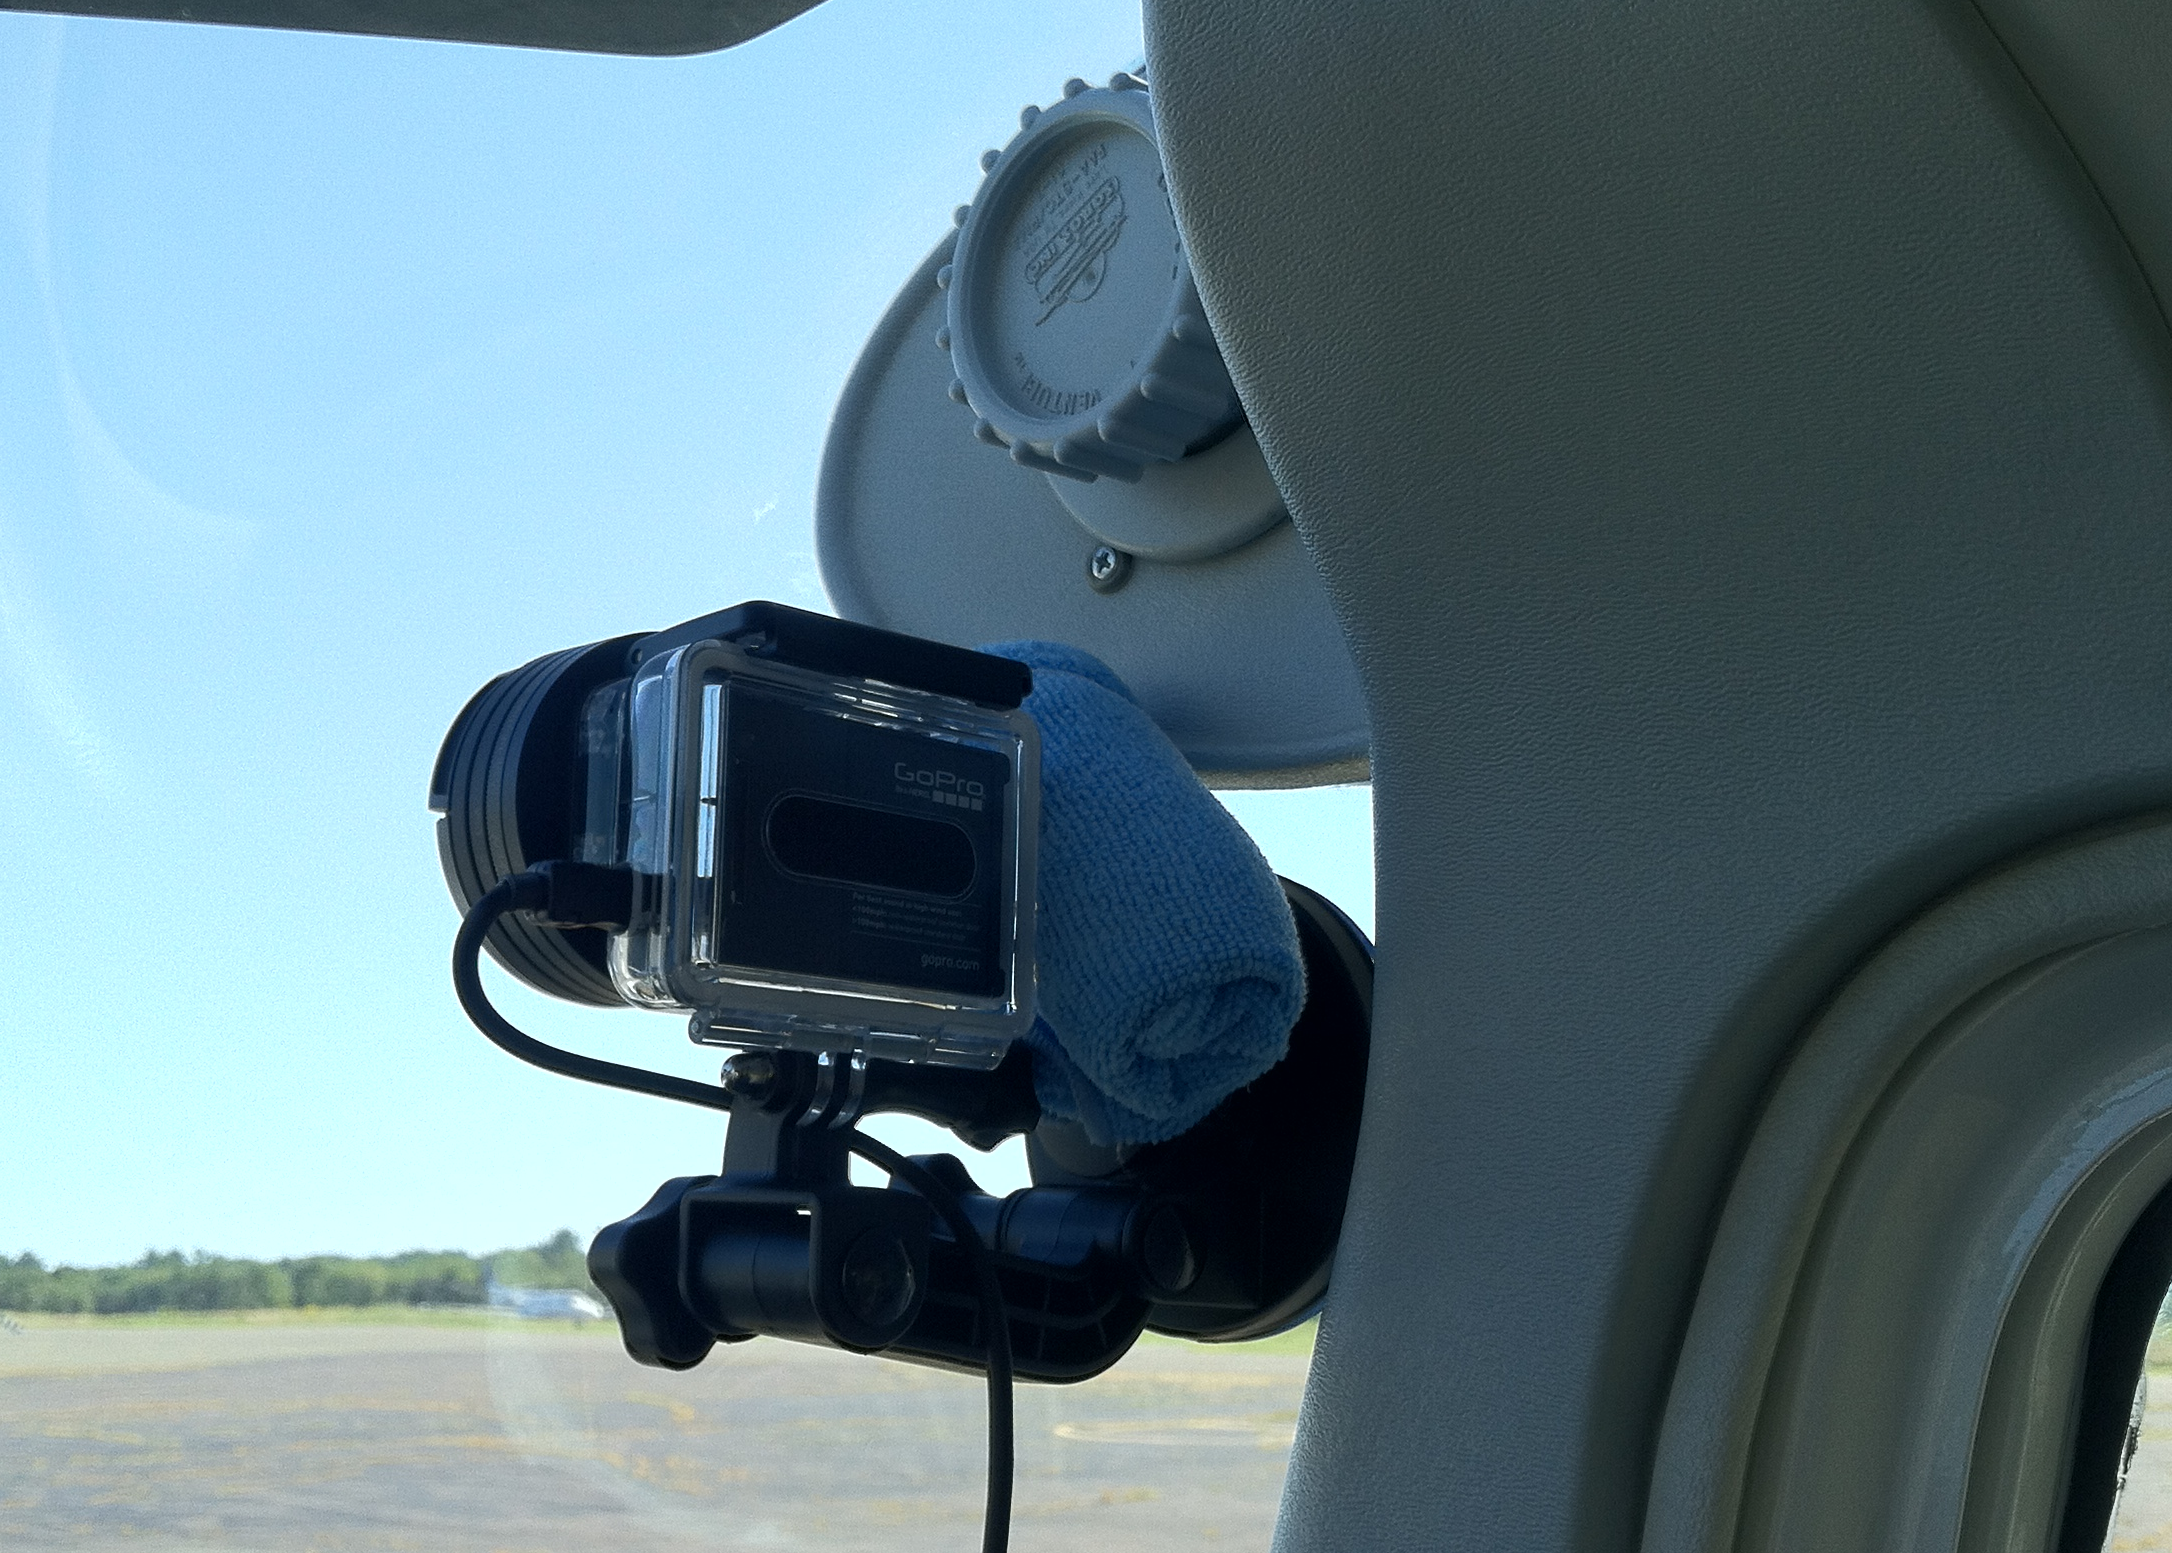
The other advantage of this mounting point is that it minimizes the obstruction of the view by the nose of the aircraft, and doesn’t block the pilot’s view outside much.
Finally, I do minimal processing using the GoPro CineForm Studio software. I find the default settings do too much smoothing, so I change that to give a sharper image. I may also make very small corrections to exposure or color temperature.
That’s it! My videos now look much better than the first ones I made. Please share any other useful tips in the comments.